Figuring out how to dual boot linux and windows gives you the ultimate computing flexibility. You keep your familiar environment for specific software while exploring open-source power on the exact same hardware. This setup requires careful preparation to ensure both systems operate perfectly without corrupting your data.
The Benefits Of Running Two Systems
Many students need proprietary software for specific university courses or remote examinations. You run premium creative suites or standard office applications natively on your primary partition without relying on buggy translation layers. You simply restart your machine and switch to your open-source environment for programming assignments or server management practice.
Gamers frequently utilize this exact setup to maximize their entertainment options securely. You play demanding competitive shooters with strict anti-cheat requirements on your traditional system. You then switch environments to enjoy a customized, distraction-free workspace dedicated entirely to your productivity.
Testing new distributions becomes incredibly easy when you maintain a reliable fallback system. You experiment with different desktop environments or complex server configurations without fear of breaking your computer. A catastrophic error on your experimental partition never impacts your ability to complete urgent work tasks.
Assessing Your Hardware Capabilities
You need adequate storage space to accommodate two entirely separate operating systems comfortably. A drive with at least five hundred gigabytes provides a healthy buffer for both systems and your personal files. Trying to squeeze two operating systems onto a tiny laptop drive creates constant storage management headaches.
System memory rarely causes issues during the actual boot selection process. However, you want at least eight gigabytes of RAM to ensure your systems run smoothly once loaded. Modern graphical interfaces consume significant memory before you even open a complex web browser.
You must identify whether your motherboard uses traditional BIOS or modern UEFI firmware. Almost all computers manufactured after the year 2012 use the advanced UEFI standard to manage hardware initialization. You access this interface by pressing a specific manufacturer key during the initial startup sequence.
- Minimum five hundred gigabytes of total storage space
- At least eight gigabytes of system memory
- A blank USB flash drive for installation media
- An external hard drive for data backups
Securing Your Important Data
Modifying hard drive partitions carries a small but real risk of data corruption. A sudden power failure during the drive resizing process instantly destroys your entire file system. You absolutely must copy your essential documents and photographs to an external storage device before proceeding.
Cloud storage platforms offer a convenient secondary backup location for your most critical files. You upload your university assignments or current work projects to ensure you never lose your academic progress. Relying solely on a single physical backup drive leaves you vulnerable to unexpected hardware failure.
Creating a complete system image provides the ultimate safety net for your computer. You use specialized software to clone your exact drive state onto a massive external hard drive. This tool allows you to restore your computer completely if you make a fatal mistake during the installation.
Preparing The Primary Environment
You start the preparation process inside your current proprietary operating system. You run the built-in disk cleanup utility to remove temporary files and old system update caches. Clearing this digital clutter frees up valuable gigabytes you desperately need for your new partition.
Defragmenting a mechanical hard drive consolidates your data to the front of the physical disk. This step ensures the resizing tool finds a continuous block of empty space at the end of the drive. You completely skip this defragmentation step if your computer uses a modern solid-state drive.
Solid-state drives handle data placement entirely differently than older mechanical storage devices. Running a defragmentation cycle on a modern drive wastes read and write cycles unnecessarily. You simply verify you have enough free space and proceed directly to the disk management utility.
Shrinking Your Active Partition
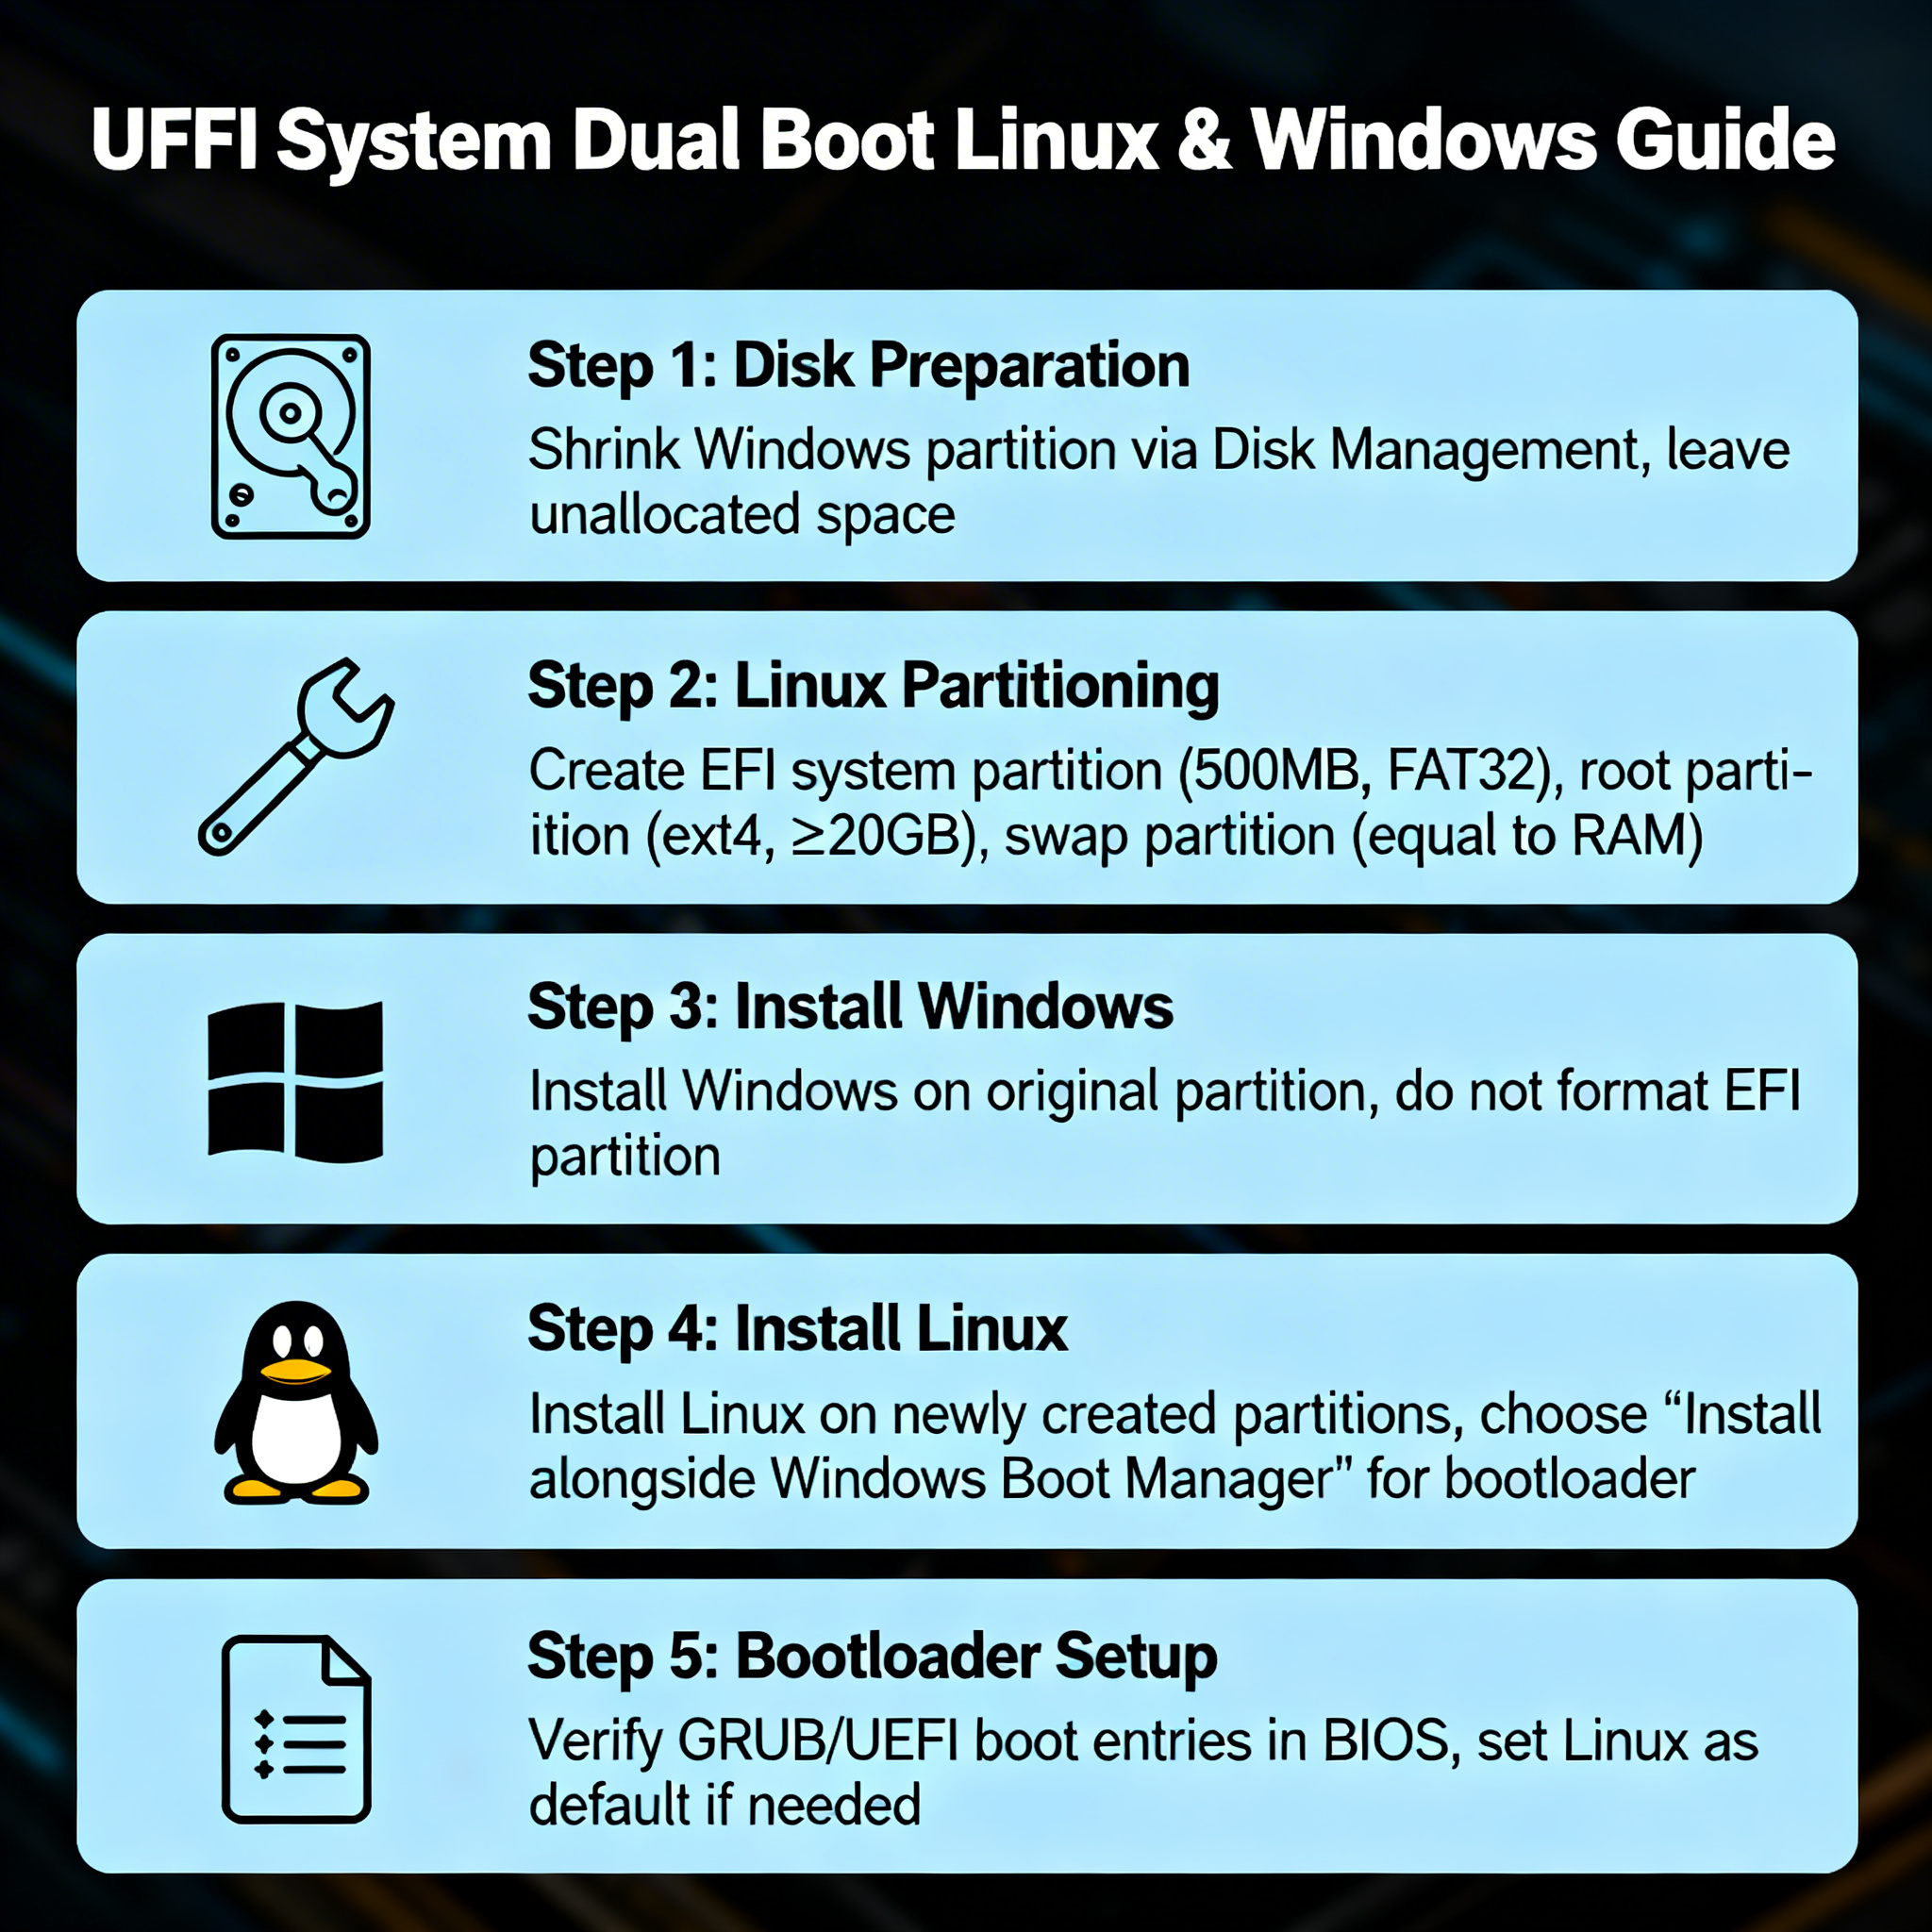
You press the super key and search for the disk management tool to begin allocating space. The utility displays a visual representation of your physical drives and their current partitions. You right-click your main volume and select the shrink volume option from the context menu.
The system calculates exactly how much space it safely allows you to separate from the main drive. You enter the amount of space you want to dedicate to your new operating system using megabytes. You need at least fifty thousand megabytes to establish a comfortable working environment for a modern distribution.
Clicking the shrink button creates a distinct block of unallocated space at the end of your drive. You leave this space completely unformatted for now. The installation wizard handles the complex formatting process automatically when you boot from your flash drive later.
Bypassing Hardware Restrictions
Manufacturers enable a feature called fast startup to make computers boot faster artificially. This feature puts your system into a deep hibernation state instead of shutting it down completely. You must disable this setting in the power control panel to prevent the system from locking your hard drive.
A locked hard drive prevents your new operating system from reading or modifying your core files. You navigate to your power plan settings and uncheck the fast startup box hidden under the advanced options. You reboot your computer completely to ensure the system releases its grip on the storage drive.
Secure boot represents another major hurdle you frequently encounter on modern motherboards. This security feature prevents unauthorized operating systems from loading during the critical boot sequence. You enter your motherboard firmware settings and toggle secure boot off to allow your installation media to run.
Writing The Installation Media
You download the system image file of your chosen distribution directly from the official developer website. You avoid third-party hosting sites completely to ensure nobody tampered with the core system files. This single file contains the complete operating system compressed into a deployable package.
You connect a blank flash drive holding at least eight gigabytes of total storage capacity. You run a dedicated flashing utility to write the system image onto the drive safely. The software formats your flash drive entirely, so you confirm no important files remain on it.
The writing process takes several minutes depending heavily on the speed of your USB port. You wait for the software to verify the written data successfully before pulling the drive out. A corrupted installation drive causes strange graphical errors that frustrate beginners instantly.
Initiating The Boot Sequence
You leave the prepared flash drive connected and restart your computer entirely. You repeatedly tap your specific boot menu key the exact moment your screen turns on. This key varies by manufacturer but usually maps to the F12, F8, or Escape key.
A simple text menu appears listing all available storage devices connected to your motherboard. You use your arrow keys to highlight your specific flash drive and press enter to confirm your selection. The computer ignores your primary hard drive and loads the files directly from your USB stick.
Most modern distributions drop you directly into a functional live desktop environment. You use this opportunity to verify your wireless internet connects properly and your audio outputs function correctly. You click the install icon on the desktop background once you confirm your hardware works.
“Running two systems on one machine transforms a standard computer into an incredibly powerful educational tool.”
Navigating The Installer Options
The installation wizard guides you through selecting your preferred language and keyboard layout. You connect to your local wireless network if you skipped that step in the live environment. The system downloads the absolute newest security patches while the main installation runs in the background.
A critical screen asks if you want to install third-party software and proprietary media codecs. You always check this box to ensure your system plays video files and recognizes specific network cards immediately. Skipping this step forces you to hunt down these essential files manually later.
The installer detects your current operating system and presents several automated configuration choices. You select the option that explicitly states it will install alongside your existing setup. This automated choice protects your personal files and utilizes the empty space you created earlier.
Manual Partitioning For Advanced Control
Selecting the manual partitioning option gives you absolute control over your physical drive structure. You select the unallocated space block and create a new partition formatted with the ext4 file system. You assign this partition the root mount point, represented by a single forward slash.
Creating a separate home partition protects your personal configuration files during future system upgrades. You allocate the remaining empty space to a second partition and assign it the home mount point. This separation functions similarly to keeping your personal files on a completely separate physical drive.
Older computers required a dedicated swap partition to handle temporary memory overflow safely. Modern distributions utilize a simple swap file located directly on your root partition instead. You skip creating a dedicated swap partition entirely unless you run a very specific enterprise distribution.
Setting Up The Grub Bootloader
The installation process finishes by writing a specialized boot manager called GRUB to your motherboard. This tiny program loads before anything else and controls exactly which operating system starts. It automatically scans your entire computer and lists every valid system it finds.
You restart your computer and pull out the installation flash drive when prompted by the screen. A black screen appears presenting a text list of your installed operating systems. You use the arrow keys to highlight your choice and press enter to load that specific environment.
The menu defaults to your new open-source system if you touch nothing for ten seconds. You customize this default behavior later by editing a simple text configuration file. You configure the timer to wait longer or remember the exact system you successfully loaded last.
Fixing Hardware Clock Conflicts
You frequently notice your computer displays the incorrect time after switching between your operating environments. Traditional operating systems assume your motherboard clock stores your specific local time automatically. Open-source systems assume your motherboard clock strictly stores universal coordinated time.
This fundamental disagreement causes your system clock to jump forward or backward every time you reboot. You fix this conflict quickly by forcing your new system to read the hardware clock as local time. You execute a single terminal command that adjusts the time tracking protocol permanently.
Alternatively, you modify the registry in your traditional system to force it to read universal time. Most users find tweaking the open-source environment significantly easier and safer than editing complex system registries. Your clock remains perfectly synchronized across both environments once you apply this simple fix.
Sharing Files Across Partitions
Accessing your personal documents from either environment improves your overall daily workflow tremendously. Your open-source system reads and writes to traditional NTFS partitions without requiring any extra software. You simply open your file manager and click your old drive volume to access your files immediately.
Traditional operating systems stubbornly refuse to recognize modern ext4 file systems natively. You cannot access files stored on your new partition when booted into your old environment. You must reboot your machine completely just to retrieve a document left on the wrong partition.
Creating a third shared drive formatted as exFAT solves this frustrating limitation perfectly. Both operating systems read and write to this universal format with excellent transfer performance. You store your massive music library and shared university projects on this neutral drive for instant access anywhere.
- NTFS formats work perfectly for traditional environments
- Ext4 formats provide superior performance for open-source systems
- ExFAT formats offer universal compatibility across all operating systems
Troubleshooting Common Boot Problems
Major system updates occasionally overwrite the custom boot manager on your motherboard. Your computer boots directly into your old environment, completely hiding your new partition from view. You fix this by booting from your flash drive and running a simple boot repair utility.
Sometimes the menu fails to display your traditional operating system after a fresh installation. You log into your new environment and run the update command in your terminal. The system scans your drives again and usually finds the missing partition immediately.
Hardware changes frequently disrupt the secure boot signatures stored directly on your motherboard. You disable secure boot temporarily to regain access to your system after installing a new graphics card. You then update your system security keys before turning the protective feature back on.
Virtual Machines Versus Native Hardware
Many students ask why they should bother partitioning drives when convenient virtualization software exists. Virtual machines run an entire operating system inside a standard application window on your current desktop. You test new software quickly without restarting your physical computer at all.
The massive performance penalty remains the primary drawback of any virtualized environment. The host system permanently reserves a huge chunk of your processor and memory to run the virtual software. Your guest system feels sluggish and frequently drops frames during highly demanding tasks.
Running natively on the hardware gives your alternative system absolute access to your dedicated graphics card. You compile massive programming projects or render complex video files in a fraction of the time. The performance benefits make the partitioning process entirely worthwhile for heavy daily workloads.
“Always separate your personal files from your operating system files to prevent catastrophic data loss.”
Managing Major System Updates
Operating system upgrades occasionally cause unexpected conflicts with your custom boot manager. A massive feature update on your primary partition might completely rewrite your motherboard boot records without warning. You reboot your machine only to find your secondary system completely inaccessible.
You remain calm and simply boot from your emergency live flash drive to assess the situation. The files still exist safely on your drive, but the motherboard forgot how to locate them. You run a boot repair utility to restore the menu and regain full access to your computer.
You delay major version upgrades on your primary system until you finish critical academic projects. You let other users identify the early software bugs and document the necessary fixes on community forums. You prioritize absolute system stability over acquiring the newest visual features immediately.
Removing A System Safely
You might decide eventually that you only need a single operating system going forward. Deleting partitions recklessly instantly destroys your ability to boot your computer at all. You must restore the original boot manager completely before deleting any partitions.
You boot into your traditional environment and open the command prompt as an administrator. You execute a specific command that rewrites the original boot sequence to your motherboard. This bypasses the custom menu entirely and loads your primary system directly upon startup.
You open the disk management tool and delete the partitions containing your alternative operating system. You right-click your main volume and select the extend option to reclaim all the empty space. Your computer returns to its original single-system state without losing any of your main personal files.
Embracing Your Dual Environment
Managing two separate systems on one machine demands a fundamental understanding of computer architecture. You learn exactly how storage volumes work and how motherboards initialize hardware during the startup process. This technical knowledge proves incredibly valuable throughout your entire professional career.
You configure your workspace exactly how you prefer without sacrificing compatibility with proprietary industry standards. You utilize the absolute best tools from both worlds on a single physical computer. Your daily workflow becomes significantly more resilient and adaptable to changing academic requirements.
The initial setup process takes an hour, but the massive benefits last the entire lifetime of your computer. You approach complex technical problems with complete confidence knowing you always have a secure fallback environment. You truly maximize the absolute potential of the computer hardware you purchased.